A Practical Guide to the Twitter Card Validator
Master the Twitter card validator to fix broken link previews on X. This guide shows you how to debug cards, solve common errors, and ensure perfect shares.

On this page (6)
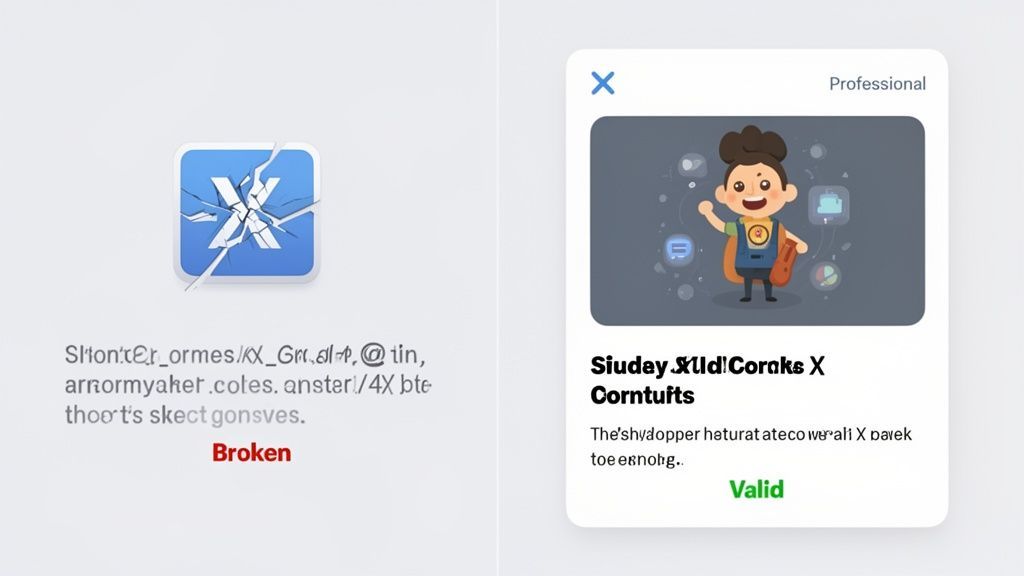
Ever shared a link on X, only to see it show up as a jumbled mess with a missing image? We've all been there. It’s a common frustration that can really kill your content's first impression. The fix is a simple, official tool called the Twitter Card Validator, which lets you diagnose and preview exactly how your links will look before you post.
Why Your Links Look Broken on X and How to Fix Them
When you share a link on X (what used to be Twitter), the platform scans your webpage for special bits of code to build a rich preview, known as an X Card. This card is meant to pull in a title, a short description, and an eye-catching image. If that code is missing or wrong, X just gives up and shows a plain, unappealing text link.
This is more than just a cosmetic problem; it's about engagement. A polished card grabs attention and begs to be clicked, while a broken one looks unprofessional and gets completely lost in a busy feed. It’s the digital equivalent of showing up to a meeting in a wrinkled shirt.
The Role of Meta Tags
The magic behind these link previews lies in meta tags, small snippets of code tucked away in your website's <head> section. When your links look like plain text on X, it’s almost always because the page is missing the right metadata for X Cards. To make sure your shared content looks professional, getting comfortable with using the right URL for Twitter is your first step.
X primarily looks for its own twitter: tags, but it’s smart enough to use Open Graph (og:) tags as a fallback. Without either of these, X simply doesn't know what to show.
Diagnosing Problems Before They Go Live
This is where the Twitter Card Validator becomes your best friend. It’s a free tool that simulates how X will "read" your URL and then shows you a preview of the card. It's the only real way to be 100% certain your content will look exactly as you intended when it goes live.
You just paste your link, click "Preview card," and the validator shows you the final card along with a log of any issues it found. This immediate feedback is perfect for catching problems early.
Making this check a routine part of your publishing workflow is a game-changer. For example, before scheduling posts in a tool like PostFast, a quick 10-second check in the validator can save you from a public-facing mistake. If you’re looking to automate more of your X presence, you might find our guide on integrating with the X API useful.
Ultimately, this proactive step is the difference between looking like an amateur and looking like a pro with every single share.
How to Use the Official X Card Validator
Jumping into the X Card Validator is a hands-on process. Let’s walk through exactly how to check your links so you can feel confident every time you share content on X.
First things first, you need to find the tool. It's officially hosted by X (formerly Twitter), and a quick search for "X Card Validator" will get you there. Once the page loads, you’ll see a simple interface with just one input field. This is where the magic happens.
From URL to Preview
Grab the full URL of the blog post or landing page you want to check. It's crucial that you paste the complete address, https:// and all, into the "Card URL" field.
Once you’ve pasted your link, click the "Preview card" button. The validator then acts just like X’s own crawler, visiting your page to read its code. The whole thing usually takes just a few seconds.
Pro Tip: I make it a habit to run every important link through the validator before I even add it to my content scheduler. A quick 15-second check before queuing up a post in a tool like PostFast ensures I never publish something with a broken preview.
After the scan finishes, the results pop up, split into two main sections.
Interpreting the Validator Results
On the right side of the page, you'll find the card preview. This is the most important part because it shows you exactly how your link will look in someone's feed. Is the image right? Is the headline correct? Is the description compelling? This visual feedback is immediate and priceless.
Over on the left, you'll see the log. This area gives you the technical rundown of what the validator found. If everything is good to go, you'll see a green "Card loaded successfully" message and a list of all the meta tags it discovered on your page.
For instance, a successful log will look something like this:
INFO: Page fetched successfullyINFO: 20 meta tags were foundINFO: twitter:card = summary_large_image tag foundINFO: Card loaded successfully
If there's an issue, this log is your first port of call. It will flash error messages in red, often pointing directly to the problem, like an image being too small or a required tag missing.
Seeing "Card loaded successfully" is the green light you're looking for. It confirms X can read your page's data and will generate that beautiful, rich preview. If you see anything else, it’s time to start troubleshooting, which we’ll dive into next.
Decoding Common Card Validator Errors
Seeing a red error message in the X Card Validator can feel like hitting a wall, but don't worry. Most of these alerts point to simple issues that are easy to fix once you know what you're looking for. Think of this as your personal troubleshooting guide for the most common roadblocks.
We'll walk through the usual suspects, like the dreaded "Unable to render Card preview" or "Card could not be loaded." For each one, I'll explain what's likely going on in plain English and give you clear, actionable advice to get your previews looking perfect.
The whole debugging process is a bit like a flowchart: you pop in your URL, see the result, and then figure out your next move based on whether it’s a success or an error.
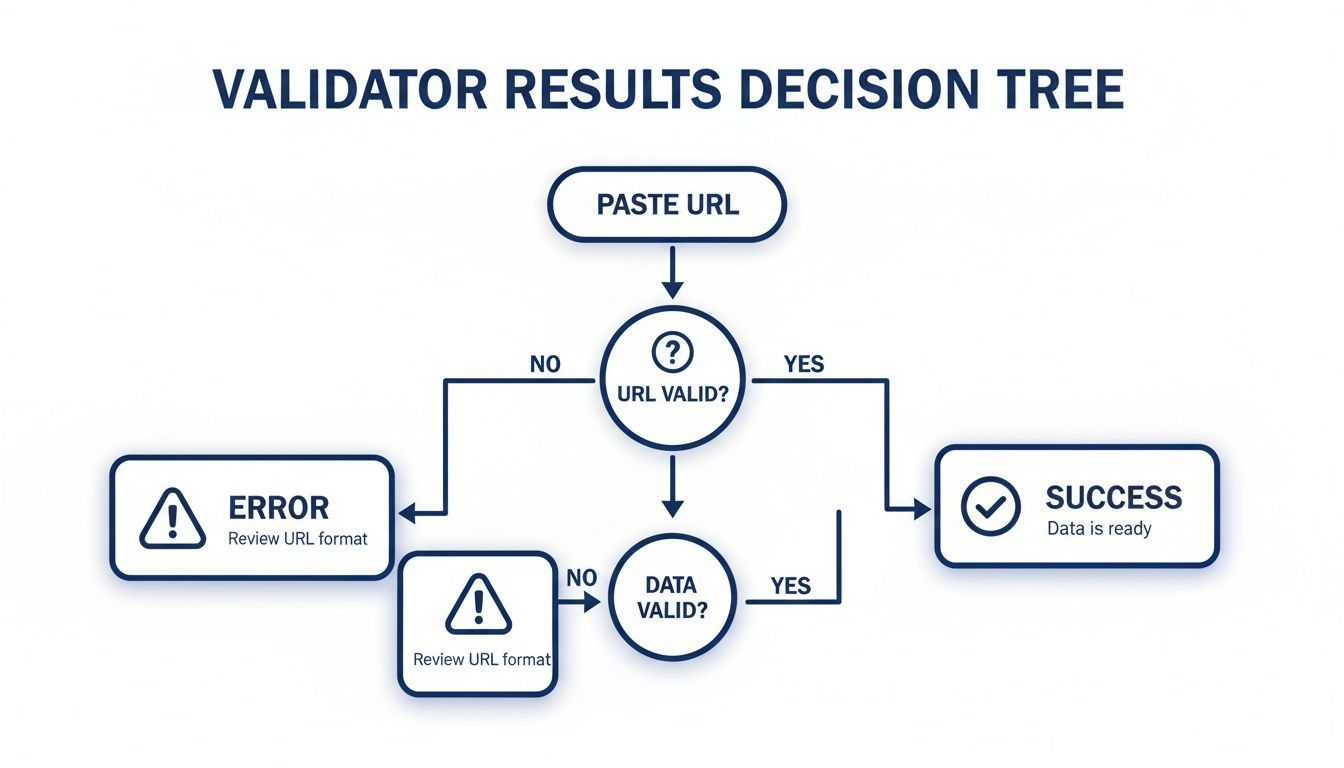
The takeaway here is simple. Every test gives you one of two outcomes: it either confirms your setup is good to go, or it hands you the exact error data you need to start fixing things.
Missing or Incorrect Meta Tags
The most common culprit behind a failed validation is a problem with the meta tags themselves. It's almost always the first place you should look.
If the validator log says something like "INFO: twitter:card tag not found," it's telling you that the most basic instruction is missing from your webpage. Without it, X doesn't even know you want to create a card in the first place. Similarly, an error might flag a missing twitter:title or twitter:image tag. Every card type has a few non-negotiable tags that absolutely must be present.
To sort this out, you'll need to jump into your website’s HTML <head> section or your CMS settings and add the missing tags. A good habit is to copy and paste them from a trusted source to avoid typos, another surprisingly common source of errors.
You need at least four essential tags for a basic card to work:
twitter:card,twitter:site,twitter:title, andtwitter:description. For cards with images,twitter:imageis also mandatory.
I've put together a quick-reference table below to help you keep track of the essential tags. Having this handy can save you a lot of time when you're debugging.
Essential X Card Meta Tags at a Glance
| Meta Tag | Required? | Card Type | Description & Best Practice |
|---|---|---|---|
twitter:card | Yes | All | Specifies the card type. summary_large_image is usually the best choice for visual impact. |
twitter:title | Yes | All | The headline of your card. Keep it under 70 characters to avoid it being cut off. |
twitter:description | Yes | Summary & Player | The descriptive text. Aim for around 125 characters to provide context without truncation. |
twitter:image | Yes | Summary & Summary Large Image | The full URL to your image. Use a 1.91:1 ratio and keep the file size below 5MB. |
twitter:site | Recommended | All | The @username of the website's X account. It provides valuable attribution. |
Bookmark this table. It's a real time-saver.
Image and File Size Issues
Another frequent trouble spot is the image. If your card preview shows up without a picture, or the log mentions an image-related error, it usually comes down to one of three things:
- File Size: Your card image must be under 5MB. If it's too big, X's crawler will simply give up trying to fetch it.
- Dimensions: While X supports a range of sizes, the ideal aspect ratio is 1.91:1 (e.g., 1200x628 pixels). Images that are too small or have a very unusual shape might fail to render.
- Incorrect URL: The
twitter:imagetag must contain an absolute URL, meaning it has to start withhttps://.... A relative path like/images/my-photo.jpgwon't work because X's servers won't have a clue where to find it.
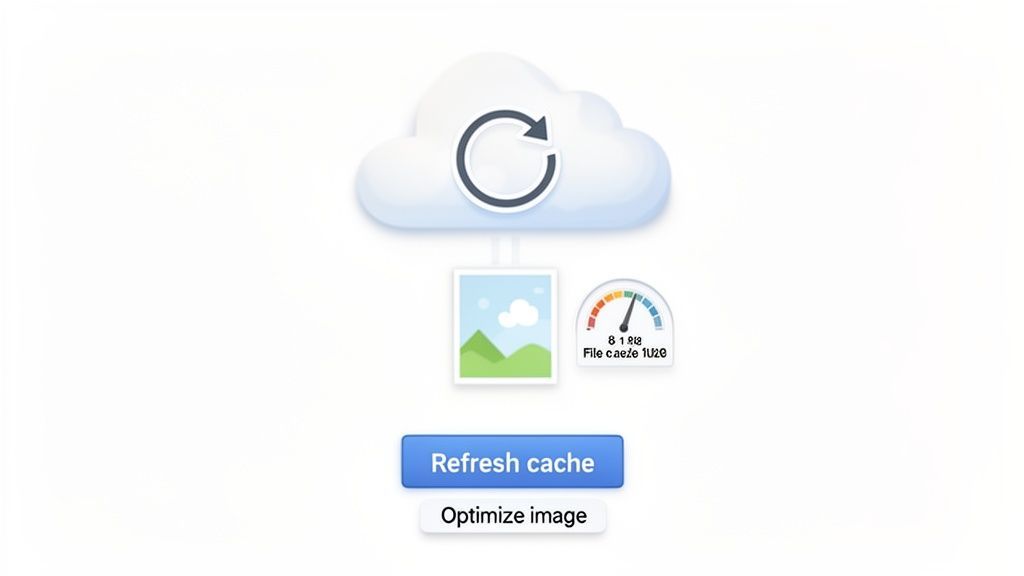
Always double-check that your image URL is correct and that the image itself is optimised for the web. A quick run through an image compression tool can often solve the problem instantly.
Solving Tricky Caching and Image Issues
So, you’ve hunted down the error in the Twitter card validator, fixed up your meta tags, and everything looks spot-on. You hit "Preview card" again, feeling confident, only to see… the exact same broken preview.
This is probably the most frustrating part of the whole process. And nine times out of ten, it’s down to one thing: caching.
X’s servers are built for speed. The very first time someone shares a link, X’s crawler grabs all the card data and saves a copy. Every time that link is shared again, it just serves up that saved version instead of checking your site again. This is great for performance but a real pain when you’ve just fixed a mistake.
The good news? Running your URL back through the validator usually forces a refresh. It’s a signal to X’s servers to ditch the old, stale data and fetch a fresh copy. X officially states this cache lasts for about seven days, so just waiting it out is never really an option.
Tackling Stubborn Image Problems
If you've cleared the cache and the preview is still broken, the image itself is the next suspect. A card preview without a picture is a huge engagement killer, and the problem often boils down to very specific technical details.
When your image refuses to show up even with a perfect twitter:image tag, start digging into these common culprits:
- Wrong Aspect Ratio: For a
summary_large_imagecard, you need a 1.91:1 aspect ratio. Think widescreen. If your image is too tall or square, it might just get ignored. - File Size: Your image file has to be under 5MB. Anything bigger and X’s crawler might give up before it finishes downloading.
- Absolute vs. Relative URLs: The image URL must be absolute; it needs to start with
https://. A relative path like/images/my-pic.jpgmeans nothing to X's servers.
My workflow is to finalise and optimise all my blog images before they even touch the server. That way, I know they meet the requirements right from the start. You can find a detailed breakdown of the latest specs in our complete guide to X image sizes.
A Quick Fix for a Stubborn Cache: If the validator just won't show your updated card, try adding a meaningless query parameter to your URL, like
?v=2. This little trick makes X think it’s a brand-new link, forcing it to ignore the old cache and crawl the page fresh.
Ensuring Your Images Are Accessible
Beyond just size and dimensions, your server setup can also get in the way. The image has to be accessible to X’s crawler, known as "Twitterbot." If your robots.txt file is accidentally telling crawlers to stay out of your images folder, Twitterbot won't be able to fetch them.
Another thing to check is "hotlink protection." Some web hosts enable this to stop other sites from leaching your bandwidth by embedding your images. While useful, it can also block legitimate crawlers.
If you’ve checked everything else, it’s worth a look at your server settings to make sure Twitterbot isn't being blocked. It’s a more advanced step, but it’s often the final piece of the puzzle for those really persistent image issues.
Building a Workflow for Perfect Shares Every Time
Fixing problems is good. Preventing them is a whole lot better. Now that we’ve walked through the nitty-gritty of debugging, let's zoom out and build a solid workflow. The goal is simple: make checking your link previews a standard part of your publishing routine, just like proofreading for typos.
This is where a little discipline goes a long way. By creating a simple pre-flight checklist for your content, you can catch pretty much every potential card issue before your audience ever sees it. This isn't about adding more work; it's a proactive strategy that saves you time and protects your brand's professional image with every share.
Make Validation Part of Your Checklist
The key is to weave the Twitter Card Validator into your process right before you publish or schedule. It’s a simple habit that creates a powerful quality control checkpoint, and it only takes a few seconds.
A typical workflow might look like this:
- Write and edit your content: Finalise the blog post or landing page.
- Optimise your featured image: Make sure it hits X’s aspect ratio and file size requirements.
- Run the URL through the validator: Paste the link into the official validator for a quick preview check.
- Schedule your post: Once you see that "Card loaded successfully" message, you can confidently add it to your content calendar.
This is exactly where a tool like PostFast fits into the picture. You can draft and schedule all your posts, then pop each link into the validator for a final check before it goes live. It’s the easiest way to ensure your scheduled posts look exactly as you intended when they get published. You can learn more about our direct X integration with PostFast and see how it works.
Set Up Content Templates
Here’s another powerful tip: set up your content management system (CMS) with templates that automatically include the correct meta tags right from the start. Most modern platforms like WordPress, Shopify, or Ghost have plugins or built-in SEO settings where you can define a default structure for twitter:card, twitter:site, and other key tags.
By configuring these settings just once, you ensure every new page or post you create automatically has the foundational code already in place. This dramatically cuts down on the chances of human error, especially if you have multiple people on your team creating content.
The most effective workflows remove manual steps wherever possible. By using both content templates for meta tags and a quick validation check before scheduling, you move from a reactive 'fix it' mindset to a proactive 'get it right' strategy.
This small investment in your process pays huge dividends down the line. It's important to remember that while the technical details matter, the bigger picture is about how your brand is perceived online. A polished share helps you stand out in a crowded feed. According to recent reports, social media is a primary channel for communication, with a huge chunk of the population in many regions using these networks daily. You can find more data on digital platform usage in Bulgaria on datareportal.com to get a sense of the scale. Getting your shares right is just good business.
X Card FAQs
Even after you’ve got everything set up, a few common questions always seem to pop up around X Cards and the validator tool. Here are the ones we hear most often, with some quick, practical answers.
Why Is My Old Image or Text Still Showing Up?
This is almost always a caching problem. The first time someone shares your link, X saves a copy of the Card data to help it load faster for everyone else. If you go back and change your page's image or title, X's servers might be holding on to the old version.
The fix? Just run the URL through the Card Validator again. This usually forces X to pull a fresh copy. If that still doesn’t work, try adding a nonsense query parameter to your URL, like yoursite.com/article?v=2. X will see it as a brand-new link and fetch the updated info, bypassing the old cache completely.
Do I Really Need to Validate Every Single Link?
Not every single one, no. But you absolutely should use it for your most important content. Think of it as a quick quality check before a big launch.
It’s a great habit to validate any major blog post, new product page, or campaign landing page before you share it. A quick 10-second check can save you from the embarrassment of a broken link preview on launch day. It’s a simple step to add to any pre-publishing workflow.
What's the Difference Between Twitter Cards and Open Graph Tags?
Open Graph (OG) is a standard created by Facebook to help social networks understand webpage content. Most platforms, including X, use it. But X also created its own, more specific tags (like twitter:card) that give you more control and can override the basic OG tags.
The validator is smart. If it can't find any
twitter:tags on your page, it falls back to your OG tags. For the most consistent results on X, though, you should include both. This lets you fine-tune exactly how your content looks in the X feed.
Want to build a flawless sharing workflow from the ground up? PostFast helps you plan, schedule, and analyse all your content from a single dashboard. You can queue up weeks of posts in minutes and use our visual calendar to ensure every piece of content looks perfect before it goes live. Start your free 7-day trial of PostFast today and save hours on your social media management.
Related articles

Best AI Tools for Social Media Management in 2026 (Honest Guide)
The best AI tools for social media management in 2026: honest picks for drafting, scheduling and agent-run workflows, plus copy-paste ChatGPT prompts.

10 Ways to Make Money with AI in 2026 (Ranked by Realism)
The ways to make money with AI in 2026 that actually work, ranked by realism: AI-powered services, content systems, products and the traps to skip.

How to Make Money on Social Media in 2026: 8 Models That Actually Pay
How to make money on social media in 2026: the 8 income models, real platform payout thresholds compared, and the consistency math behind creators who earn.

How to Make Money on Instagram in 2026 (Real Numbers, No Hype)
How to make money on Instagram in 2026: the real follower thresholds for gifts and subscriptions, why brand deals pay most, and the math at every audience size.

Best Time to Post on X (Twitter) in 2026: A Practical, Data-Informed Guide
The best time to post on X (Twitter) in 2026: day-by-day windows, when 9,339 real scheduled posts actually publish, and how to find your own peak hours.

How Many Followers on TikTok Do You Need to Get Paid?
How many followers you need to get paid on TikTok in 2026: 0 for some paths, 1,000 for LIVE and Shop, 10,000 for Creator Rewards. Plus the views math.